Host MicroClient
The Digital Assistant Client can also be installed on microcontroller. Although this is the cheapest hardware option, it is also the most complicated one.
Needed Hardware
- Microcontroller ESP32-S3, for example the DevKitC Version of it. Make sure it have more than 2 MB PSRAM available.
- Any digital microphone with an I2S interface can be used as a microphone. In the example, the microphone INMP441 is used
- Any I2S module can also be used as a loudspeaker. In this example, the amplifier MAX98357A connected to a 3 Watt loudspeaker is used.
- Some cable for the connections
- A case, with the modules used in the example, the designed case in this project can be printed out using a 3D printer.
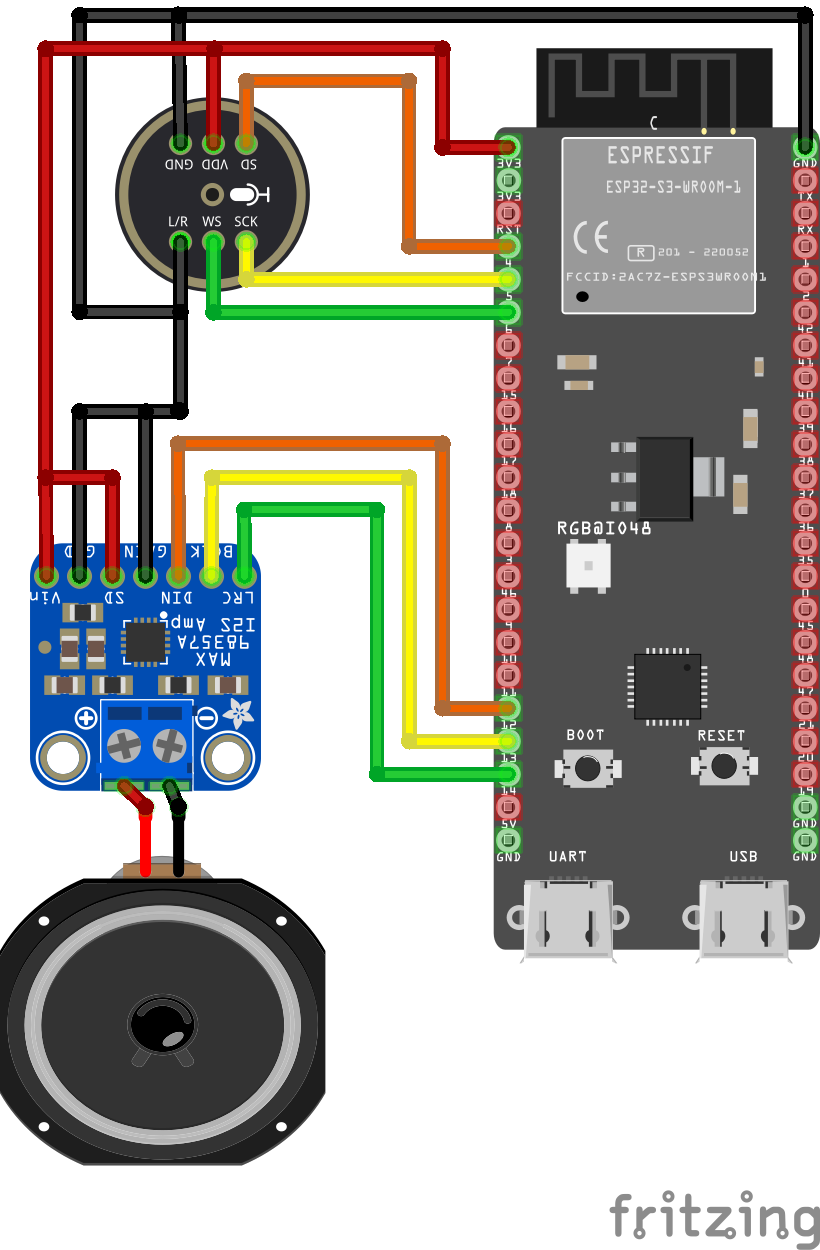
Circuit diagram
The I2S-Interfaces are preconfigured to the following pins. But the numbers can be changed in the config.h file of the MicroClient project.
Microphone Configuration
- Serial Clock Pin (SCK): 5
- Left Right Clock Pin (WS): 6
- Serial Data Pin (SD): 4
Speaker Configuration
- Serial Clock Pin (SCK): 13
- Left Right Clock Pin (WS): 14
- Serial Data Pin (SD): 12

Installation
- Install the PlatformIO extension in the visual studio code environment.
- Clone the digital assistant repository from github.
- Open the
Core/DigitalAssistant.MicroClientproject in visual studio code. - Plugin your ESP32-S3 with the USB-C COM Port to your computer.
- Configure your wifi ssid and password in the
config.hfile in the project. - Configure your upload and optionally your monitor port where the microcontroller is connected to in the
platformio.inifile. - Navigate in the sidebar to the PlatformIO extension.
- Select the action upload or upload and monitor.
Further information's how to connect the client with the server can be found in the setup client chapter of this documentation.